Basics of Writing Good Research Code
Writing good code is very important in research because
- it will help other researchers replicate your results and make further progress;
- it will make it easy to maintain and extend it;
- it will make it easy to split work across collaborators;
- it will save you from nightmares when you have to revisit it a couple of years later;
- …
Despite its importance, I have never seen a tutorial that teaches novice researchers how to write replicable and well-structured code—so I hope this blog post can fill the gap. To be fair, I am not the inventor of any good practice that I am introducing here; I learned them mostly by reading good code (e.g., PyTorch source code).
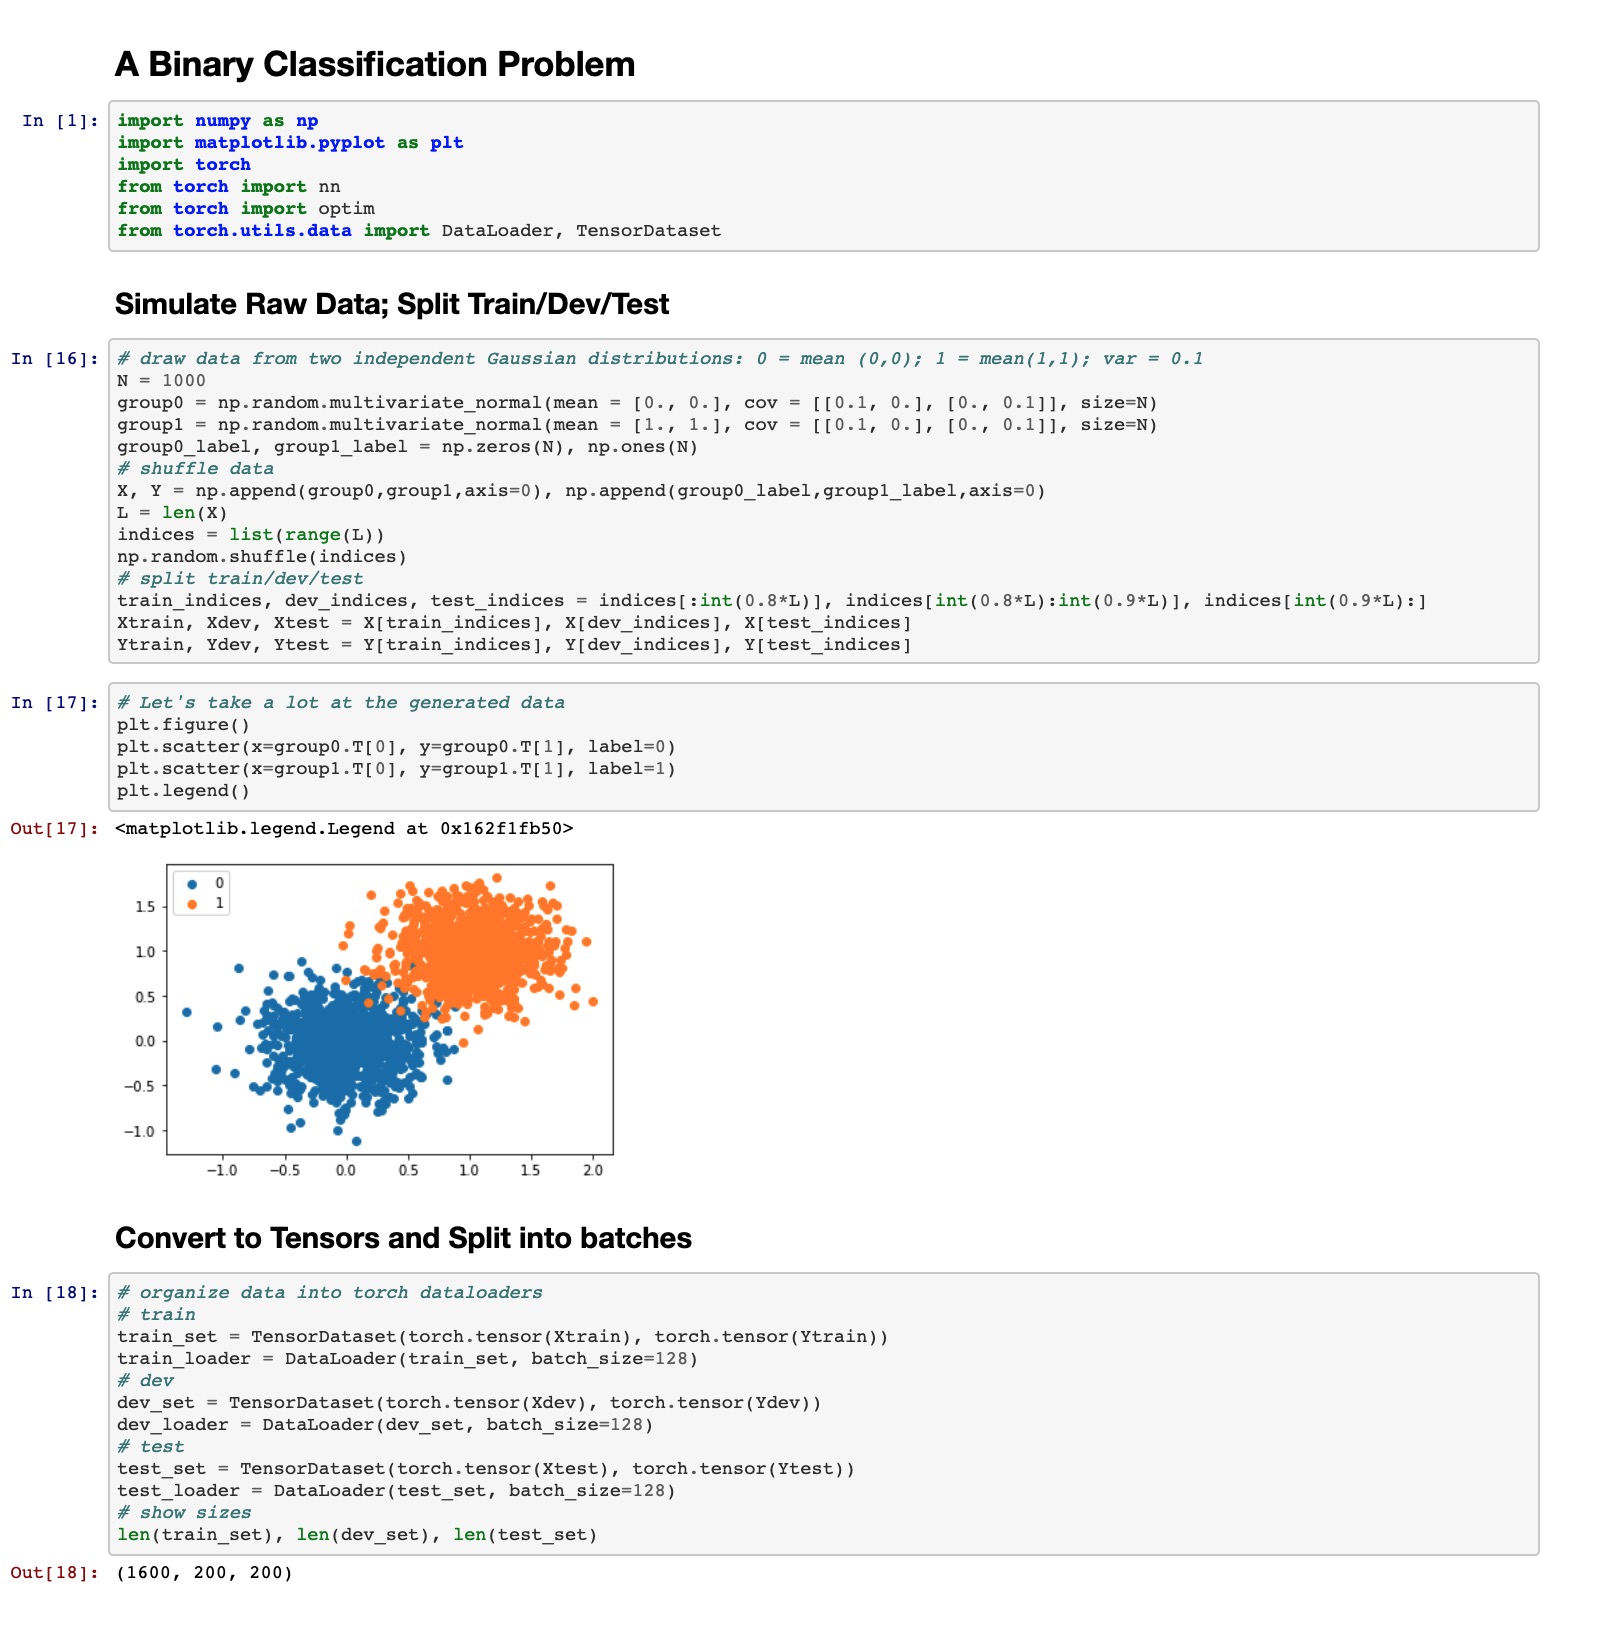
My research focus is machine learning, and I will illustrate the principles and practices with a machine learning project. In this jupyter notebook, we aim to train a 2-layer feedforward neural network (also called multi-layer perceptron or MLP) to classify 2-dimensional data generated from 2 different Gaussian distributions. The screenshots of this notebook is shown below:
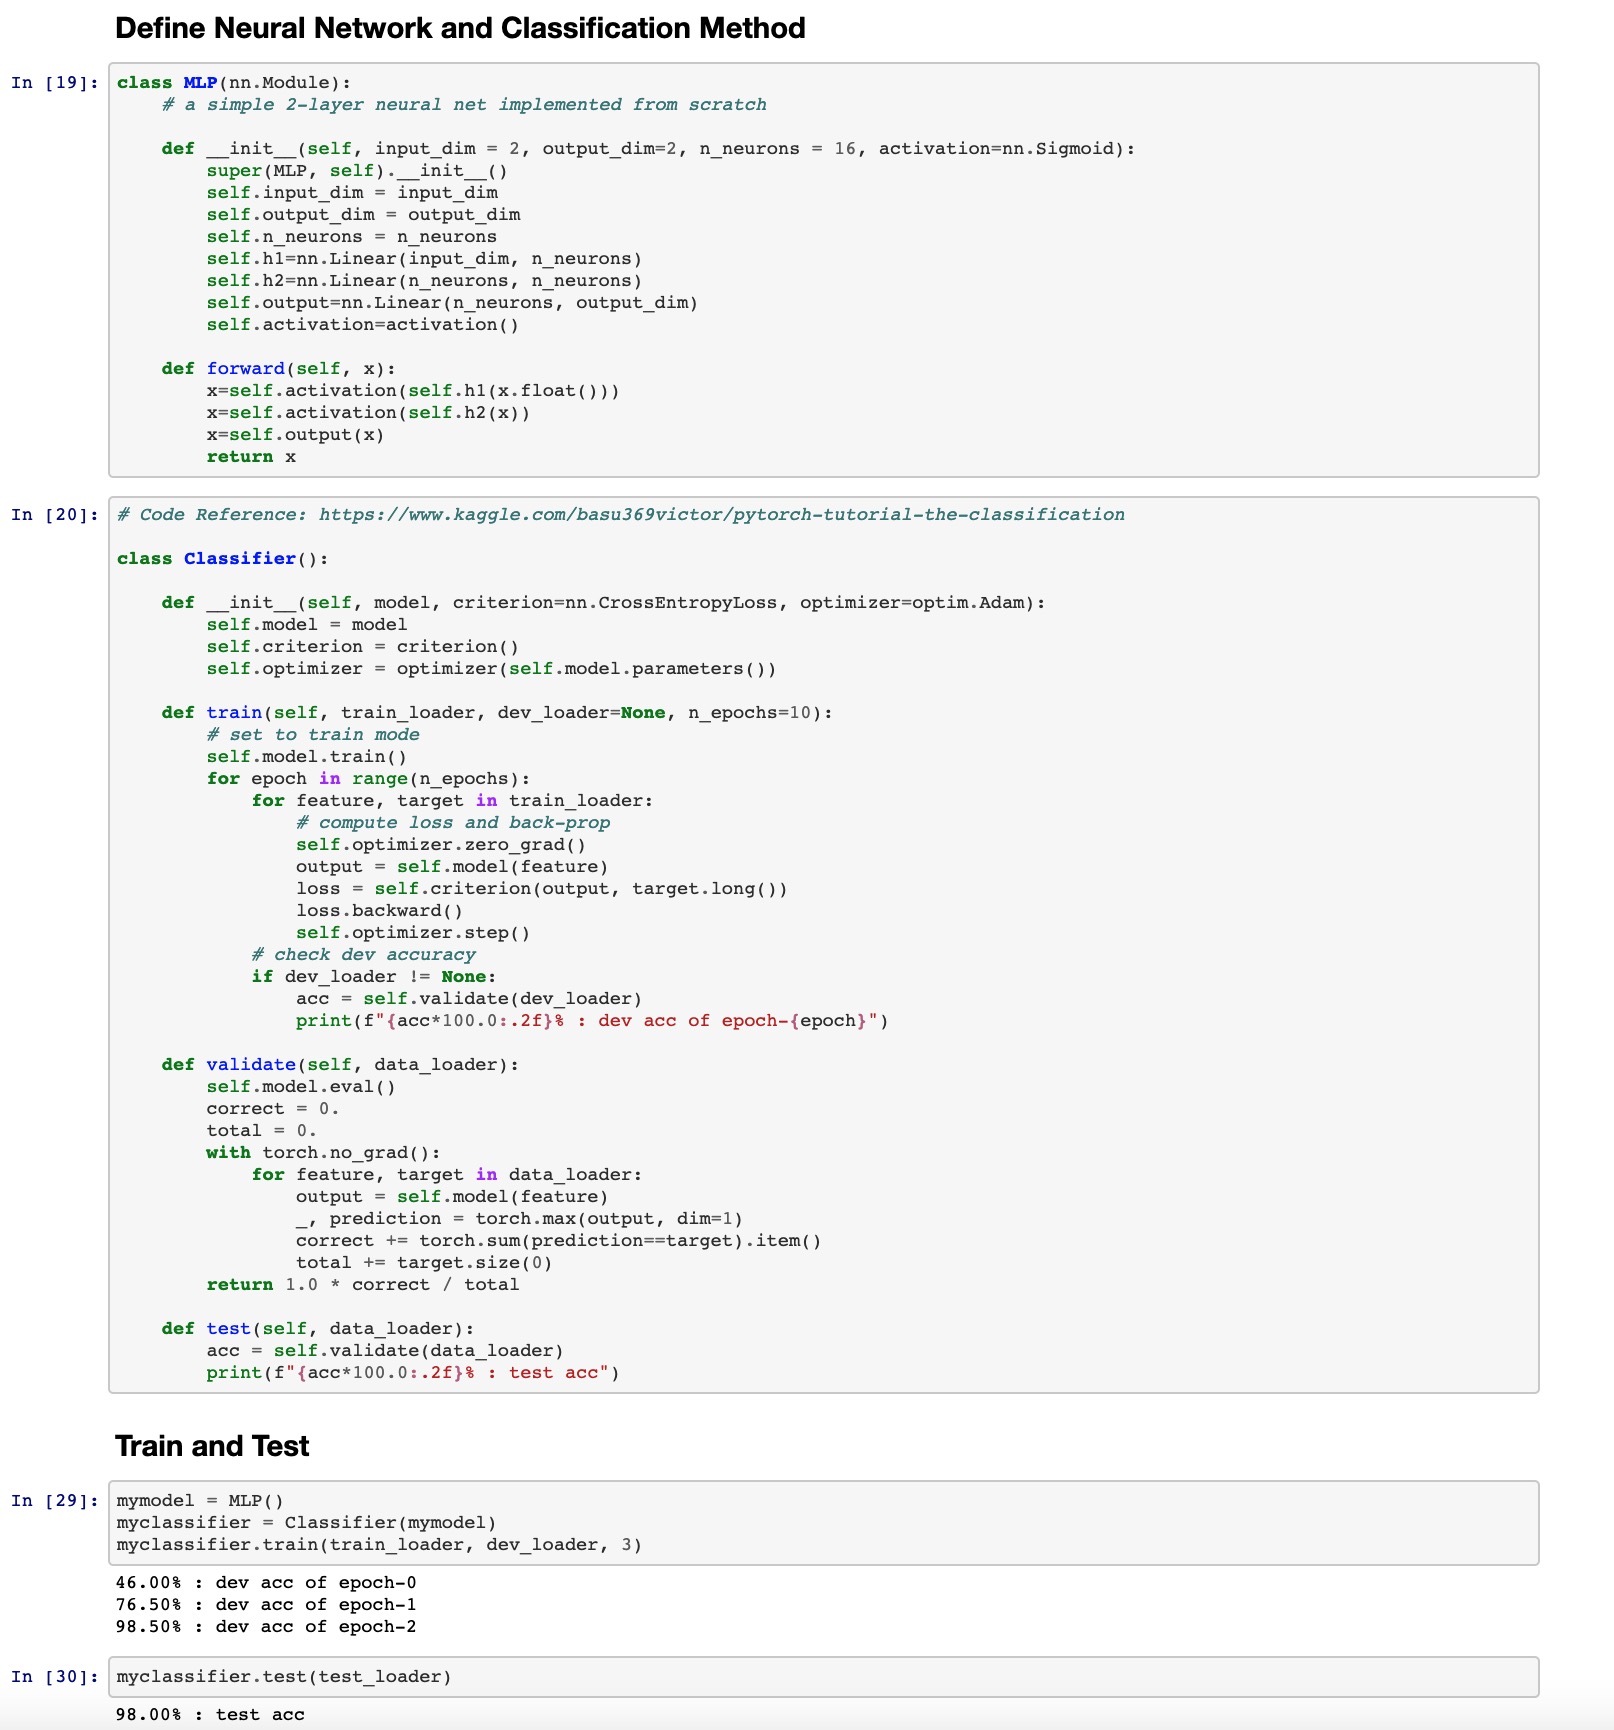
This is fairly nice code: clear flow, reasonable class design, minimum duplicate, and sufficient documentation.
But what if:
- we want to produce exactly the same results on another computer at another time?
- we want to reuse these classes in another project without copy-pasting the actual code?
- we want to try another model with other things unchanged?
- we want to have a collaborator take over a specific portion of the code?
- we believe there are bugs in a specific class and we have to run tens of tests on that class?
- …
This blog post will introduce plausible solutions to these problems.
Step-1 Setup
Note that we import torch in the code above, but a different computer may have a different version of torch installed, making it difficult to reproduce our results or even run your code there.
That being said, we want a way to tell the computer to use the specific version of torch that the code was developed in; that is what a setup.py can do for us!
Here is the setup.py that I wrote for this small educational project:
1
2
3
4
5
6
7
8
9
10
11
12
13
14
import setuptools
from setuptools import setup

setup(
    name='simpclass',
    version='1.0',
    description='a simple classification task',
    packages=setuptools.find_packages(),
    install_requires=[
        'torch==1.9.0',
        'numpy',
        'matplotlib'
        ]
    )
In the setup.py, you can specify the name, version, and description of the project.
Then you can specify the libraries—as well as their versions—that this project requires.
In this example, I require torch==1.9.0 but numpy and matplotlib can be any version (but you do need them to be compatible with torch==1.9.0).
The setup.py should be placed in the root directory of the project.
Next to it will be a directory called simpclass which stores the source code of this project.
The directory structure is as follows:
.
+-- setup.py
+-- simpclass
    +-- ...
where ... is the source code.
Now the simpclass package will be installed once you type the following command line in your terminal
pip install .
All the dependencies (e.g., torch==1.9.0) will be automatically installed as the setup.py specifies.
Now you can import simpclass and use any module (e.g., MLP or Classfier) in it, just like how you would use modules from torch.
What if the simpclass package is still in development mode and you want to edit its content?
Just install it with the argument -e which stands for “editable”:
pip install -e .
Step-2 Structure! Structure! Structure!
We of course don’t want to put just that single jupyter notebook into the simpclass directory.
In fact, we should break it into pieces, place each class into the right file, and place each file into the right subdirectory.
This way, we can develop and test each component (e.g., MLP or Classifier) of the project without interfering other parts, and multiple contributors can work on their assignments in parallel.
For this project, I think the following structure is neat and intuitive:
.
+-- setup.py
+-- simpclass
    +-- managers
        +-- __init__.py
        +-- classifier.py
    +-- models
        +-- __init__.py
        +-- mlp.py
    +-- run
        +-- __init__.py
        +-- test.py
        +-- train.py
        +-- utils.py
The classifier.py and mlp.py contain the class definitions of Classifier and MLP respectively.
Their full content can be found in this Github repo.
Here are their first few lines:
1
2
3
4
5
6
7
8
9
10
# code migrated from: https://www.kaggle.com/basu369victor/pytorch-tutorial-the-classification
import torch
from torch import nn
from torch import optim

class Classifier():

    def __init__(self, model, criterion=nn.CrossEntropyLoss, optimizer=optim.Adam):
        self.model = model
        self.criterion = criterion()
1
2
3
4
5
6
7
8
9
10
import torch
from torch import nn

class MLP(nn.Module):
    # a simple 2-layer MLP model

    def __init__(self, input_dim = 2, output_dim=2, n_neurons = 16, activation=nn.Sigmoid):
        super(MLP, self).__init__()
        self.input_dim = input_dim
        self.output_dim = output_dim
I created separate subdirectories—managers and models—for the project to be extensible:
if we ever want to try a new training method or a new model, we can simply add modules into the corresponding folders.
The __init__.py are empty files: their existence tells the setup.py to install all the modules in the corresponding folders.
The test.py and train.py both start with:
1
2
3
4
5
6
7
8
9
10
import os
import torch
from simpclass.models.mlp import MLP
from simpclass.managers.classifier import Classifier
from utils import load_data, load_model

def main():

    # FIX RANDOM SEED!!!
    torch.random.manual_seed(123)
The line of torch.random.manual_seed(123) works to fix the seed of the random number generator of torch, so that the program will generate the same random numbers on multiple executions on the same machine (or sometimes even on different machines).
This is important for reproducibility and debugging.
The utils.py contains utility functions that are used for data-loading, model-saving, model-loading, etc.
To not distract readers from the big picture, I choose to not dive into further details;
interested readers are welcome to check out this Github repo for details.
Step-3 Where Do Tests Go?
Suppose that you are the author of mlp.py.
Before committing your contribution to the shared codebase, you would like to test it.
One way is to run the test.py or train.py with it, but that may not necessarily validate its correctness.
You may have good ideas to do it in some other ways, and you don’t want them to interfere with the other (perhaps already well-tested) components—that is when you should create a tests folder and start working there!
Typically, the tests folder should be put in the same place as your source code folder, and mirrors its structure:
.
+-- setup.py
+-- simpclass
    +-- ...
    +-- models
        +-- __init__.py
        +-- mlp.py
    +-- ...
+-- tests
    +-- ...
    +-- models
        +-- __init__.py
        +-- mlp_tests.py
    +-- ...
The mlp_tests.py is where you want to write down your testing code for the mlp.py module.
You should always do your best to test your code, to make sure it is a real contribution but not a bug-factory. :-)
Step-0 Virtual Environment
So far so good?
Maybe someone would ask “what if I have another research project at the same time, which contains some code that can only properly run with torch=1.4.0? How come I could have torch=1.4.0 and torch=1.9.0 at the same time?”
Well, you can—in virtual environments! Your operating system provides you a base environment, on top of which you are allowed to create as many virtual environments as you want. Actually, I recommend that the first thing you do for each of your research projects is to create a separate virtual environment for it—that is why I call this section “Step-0” (even though it is the last thing I talk about)!
The management of virtual environments is out of the scope of this blog post.
Interested readers are encouraged to read the document of conda. (Yes, I assume everyone in machine learning uses conda.)